Acquire and Analyze Images from FLIR A70 Thermal Infrared Camera
This example shows how to acquire, preview, and analyze images from a FLIR A70 series thermal infrared camera in multiple ways.
This example uses a FLIR A70 camera, but is expected to work with other cameras in the A70 series with minor modifications.
Requirements:
Image Acquisition Toolbox™
Image Processing Toolbox™
Image Acquisition Toolbox Support Package for GenICam™ Interface
FLIR A70 GigE Vision® Thermal Infrared Camera
FLIR GenTL Producer included with the Spinnaker SDK
Gigabit Ethernet network adapter with jumbo frame support
Connect to Camera and Configure Acquisition
View available cameras.
dev = imaqhwinfo('gentl');
dev.DeviceIDs
ans = 1×1 cell array
{[1]}
dev.DeviceInfo
ans = struct with fields:
             DefaultFormat: 'Mono8'
       DeviceFileSupported: 0
                DeviceName: 'FLIR Systems FLIR A70'
                  DeviceID: 1
     VideoInputConstructor: 'videoinput('gentl', 1)'
    VideoDeviceConstructor: 'imaq.VideoDevice('gentl', 1)'
          SupportedFormats: {'Mono16'  'Mono8'  'YUV422_8_UYVY'}
Create a connection to the FLIR A70 using the gentl adapter with the videoinput function. Then, get the source properties of the videoinput object.
vid = videoinput("gentl",1,"Mono16")
Summary of Video Input Object Using 'FLIR Systems FLIR A70'.

   Acquisition Source(s):  0 is available.

  Acquisition Parameters:  '0' is the current selected source.
                           10 frames per trigger using the selected source.
                           'Mono16' video data to be logged upon START.
                           Grabbing first of every 1 frame(s).
                           Log data to 'memory' on trigger.

      Trigger Parameters:  1 'immediate' trigger(s) on START.

                  Status:  Waiting for START.
                           0 frames acquired since starting.
                           0 frames available for GETDATA.
src = getselectedsource(vid);
Because the default preview bit depth is 8-bit and a Mono16 format is used, set the preview data to full bit depth.
vid.PreviewFullBitDepth = "on";Configure Camera Properties
Specify the atmospheric and object parameters. For measurement accuracy, these parameters must be configured correctly before acquiring images. For more information about these parameters, refer to the camera manual.
src.AtmosphericTemperature = 298;
src.ObjectEmissivity = 0.85;
src.ReflectedTemperature = 298;
The temperature resolution constant is used to convert image data to °C. Set its value to 0.01 or 0.1, depending on the value of the IRFormat property. Refer to the camera manual for the appropriate values of the temperature resolution constant.
src.ImageMode = "Thermal";
src.IRFormat = "TemperatureLinear10mK";

IRFormatToTempResConstant = dictionary(TemperatureLinear10mK=0.01, TemperatureLinear100mK=0.1);
tempConstant = IRFormatToTempResConstant(src.IRFormat);
Data from the A70 has additional non-image rows appended to the image frame data. Set the camera to return only the image data by changing the ROI to match the sensor resolution.
vid.ROIPosition = [0 0 640 480];
Acquire and Display Image from Camera Then Save As RGB Image
Acquire an image from the camera using the getsnapshot function.
img = getsnapshot(vid);
Warning: ImageCompressionJPEGFormatOption property adjusted to 0 by the camera.
Warnings about property adjustments are expected.
Convert the captured image data to °C using the A70degC helper function with the temperature resolution constant value. The helper functions used in this example are attached as supporting files in the same folder as this example file.
imgC = A70degC(img,tempConstant);
Specify the temperature range of the display color limits in °C using the minimum and maximum temperature values in the image.
tempRange = [min(imgC(:)) max(imgC(:))];
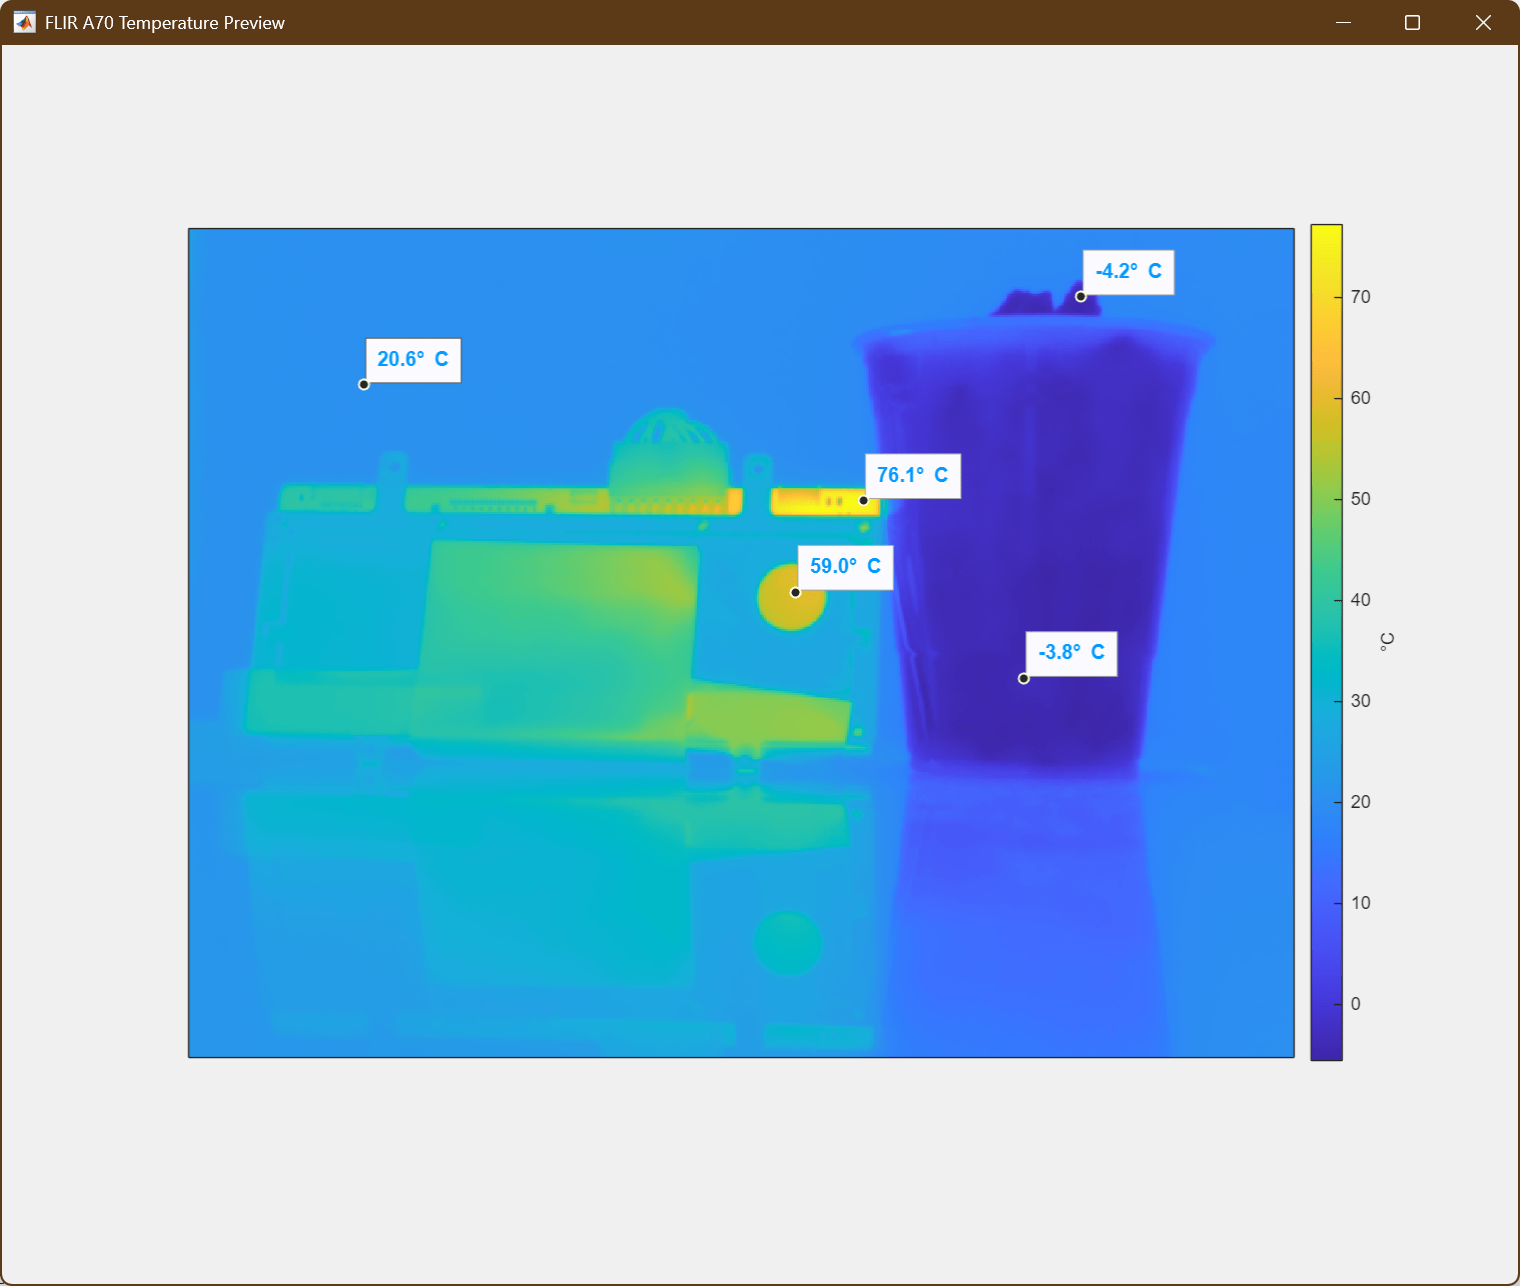
Display the thermal image using the thermalImageShow helper function with the specified temperature range and units. You can click anywhere on the image to show the temperature information of the selected pixel.
thermalImageShow(imgC,tempRange,"\circC");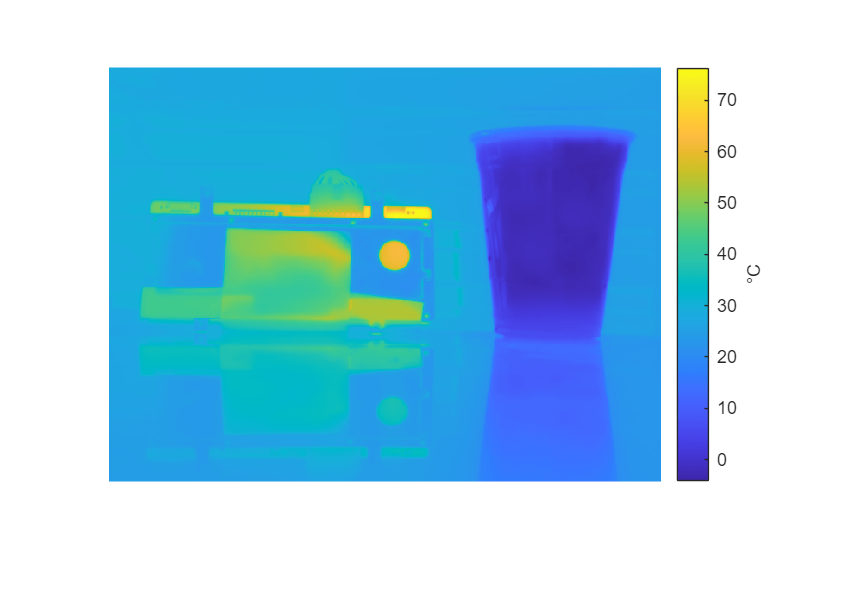
In this example, the camera is pointed at a prototype electronics board and a glass of salted ice water, so that there is a wide temperature range to display.
Convert the temperature intensity image to an RGB image using the thermal2rgb helper function with the specified temperature range and colormap. Save the converted image as an image file.
RGB = thermal2rgb(imgC,tempRange,parula);
imwrite(RGB,"thermalImageRGB.png")
Acquire and Display Video from Camera
Configure the camera's FramesPerTrigger acquisition property to capture 20 images.
vid.FramesPerTrigger = 20;
Acquire image data using the start and getdata functions.
start(vid);
Warning: ImageCompressionJPEGFormatOption property adjusted to 0 by the camera.
frames = getdata(vid,vid.FramesPerTrigger);
Convert the captured image data to °C using the A70degC helper function with the temperature resolution value tempConstant.
framesC = A70degC(frames,tempConstant);
Display the sequence of acquired image frames using the montage function with the previously specified temperature range.
montage(framesC,DisplayRange=tempRange);
colormap('parula'); % Apply a colormap to the montage
colorbar;           % Display the colorbar to see which color corresponds to which temperature

Show Live Preview from Camera
Show an interactive live preview from the camera using the A70Preview helper function.
A70Preview(vid);
Warning: ImageCompressionJPEGFormatOption property adjusted to 0 by the camera.

The live data from the camera is converted to °C and shown in the preview window. An interactive custom datatip can show the temperature at a location of interest, which is selectable by clicking.
To create your own custom preview, see Preview Live Data from Image Acquisition Device.