Publish and Receive Point Cloud ROS Messages
This example shows how to work with point cloud ROS messages and deploy them as a ROS node using MATLAB®.
Introduction to ROS
Robot Operating System (ROS) is a framework of tools, libraries, and software that aids in robotics applications. It is a communication interface that enables different parts of a robot system to discover one other and send and receive data between themselves. To enable this communication between different devices, you must first set up a ROS network.
A ROS network consists of multiple ROS nodes and a single ROS master.

A ROS node contains a collection of ROS entities, such as publishers, subscribers, and services that process and exchange data using messages.
The ROS master facilitates communication in a ROS network by keeping track of all active ROS entities. The ROS master is identified by a Master URI (Uniform Resource Identifier) that specifies the hostname or IP address of the machine running the master. Every node must register with the ROS master to be able to communicate with the rest of the network.
Communication in a ROS network consists of messages. Each ROS messages transmits on a topic. Each topic has a unique name and a message type, which determines the types of messages that can be transmitted under that topic. If a ROS node wants to share information, it uses a publisher to send data to a topic. A node that wants to receive that information uses a subscriber to get data from that same topic. You can associate multiple publishers and subscribers with a single topic.

These are the steps to exchange data over a ROS network in MATLAB.
Use
rosinit(ROS Toolbox) to create a ROS master in MATLAB and start a global node that is connected to the master.Once connected, MATLAB exchanges data with other ROS nodes through publishers (
rospublisher(ROS Toolbox)), subscribers (rossubscriber(ROS Toolbox)), and services.Use
rosshutdown(ROS Toolbox) to disconnect MATLAB from the ROS network.
Load and Segment Point Cloud Data
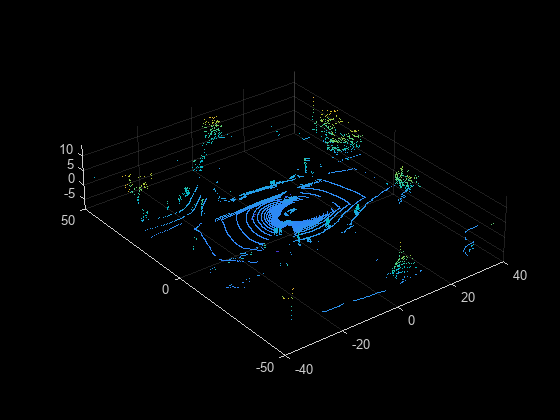
Load the point cloud data into the workspace. This point cloud was captured in a highway scenario.
ld = load("drivingLidarPoints.mat");Display the input point cloud.
pcshow(ld.ptCloud)
xlim([-40 40])
ylim([-50 50])
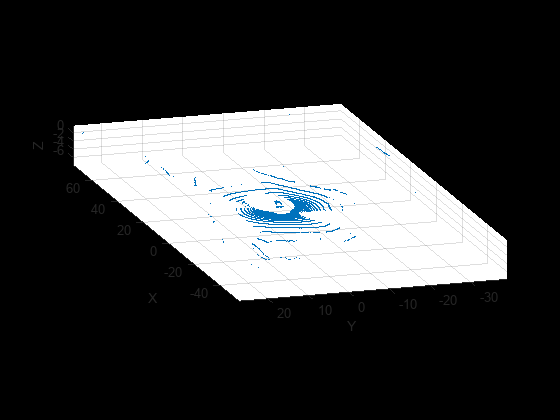
Segment the ground points from the point cloud by using the segmentGroundFromLidarData function.
groundPtsIdx = segmentGroundFromLidarData(ld.ptCloud);
groundPtCloud = select(ld.ptCloud,groundPtsIdx);
Display the ground point cloud.
figure
pcshow(groundPtCloud)
xlim([-40 40])
ylim([-50 50])

Work with Point Cloud ROS Messages
Now, publish the output ground point cloud over a ROS network.
Prerequisites
To connect to a ROS network, and generate and deploy ROS messages, you must configure your system according to the instructions in the ROS Toolbox System Requirements (ROS Toolbox).
Initialize and Configure ROS Network
Use rosinit (ROS Toolbox) to initialize ROS. By default, rosinit creates a ROS master in MATLAB and starts a global node that is connected to the master. Other ROS functions automatically use this global node.
rosinit
Launching ROS Core...
Done in 0.074085 seconds.
Initializing ROS master on http://172.19.135.186:11311.
Initializing global node /matlab_global_node_23143 with NodeURI http://vdi-bglwdp-222:52407/ and MasterURI http://localhost:11311.
The "sensor_msgs/PointCloud2" message type is the most common message type in ROS for transmitting point clouds.

You can see the standard ROS format for a point cloud message by creating an empty point cloud message. For better efficiency when creating messages or communicating, specify messages in structure format.
emptyptcloud = rosmessage("sensor_msgs/PointCloud2",DataFormat="struct")
emptyptcloud = struct with fields:
    MessageType: 'sensor_msgs/PointCloud2'
         Header: [1×1 struct]
         Height: 0
          Width: 0
         Fields: [0×1 struct]
    IsBigendian: 0
      PointStep: 0
        RowStep: 0
           Data: [0×1 uint8]
        IsDense: 0
Use rospublisher (ROS Toolbox) to create a ROS publisher for sending messages of type sensor_msgs/PointCloud2 and specify the name of the topic as /pc.
pcpub = rospublisher("/pc","sensor_msgs/PointCloud2",DataFormat="struct");
Use rossubscriber (ROS Toolbox) to create a subscriber for the /pc topic using message structures.
pcsub = rossubscriber("/pc","sensor_msgs/PointCloud2",DataFormat="struct");
Populate Message and Publish
Create a ROS message to send to the /pc topic.
pcdata = rosmessage(pcpub);
Assign the location and intensity values of the ground point cloud to the point cloud ROS message by using the rosWriteXYZ (ROS Toolbox) and rosWriteIntensity (ROS Toolbox) functions, respectively.
pcdata = rosWriteXYZ(pcdata,groundPtCloud.Location);
pcdata = rosWriteIntensity(pcdata,groundPtCloud.Intensity);
Use the send (ROS Toolbox) function to publish the message to the /pc topic using the ROS publisher object pcpub.
send(pcpub,pcdata)
pause(2)
Receive and Plot Data
View the point cloud message data, as received by the subscriber, by specifying the LatestMessage property of the subscriber object pcsub.
receivedpcdata = pcsub.LatestMessage
receivedpcdata = struct with fields:
    MessageType: 'sensor_msgs/PointCloud2'
         Header: [1×1 struct]
         Height: 1
          Width: 12474
         Fields: [4×1 struct]
    IsBigendian: 0
      PointStep: 32
        RowStep: 399168
           Data: [399168×1 uint8]
        IsDense: 0
Plot the received data.
rosPlot(receivedpcdata)
Generate and Deploy ROS Node
Generate a ROS node that uses the same procedure described in the previous section to publish sensor_msgs/PointCloud2 point cloud messages. Then, deploy the generated node on the local machine.
Configure MATLAB Coder and Generate Code
Create a MATLAB Coder configuration object that uses "Robot Operating System (ROS)" hardware. Set the build action to "Build and Run" and the deployment location to "Localhost" so that the deployed ROS node starts running on the local machine after code generation.
cfg = coder.config("exe");
cfg.Hardware = coder.hardware("Robot Operating System (ROS)");
cfg.Hardware.DeployTo = "Localhost";
cfg.Hardware.BuildAction = "Build and run";
Use the helperPublishPointCloudMsg helper function, which contains the code verified in the previous section, as the entry-point function. Generate and deploy the ROS nodes.
codegen helperPublishPointCloudMsg -config cfg
---
Running ROS node.
Code generation successful.
Verify Generated ROS Node
Retrieve the latest message from the deployed node. Plot and visualize the received point cloud.
nodeSub =  rossubscriber("/pc","sensor_msgs/PointCloud2",DataFormat="struct");
receivedNodepcdata = receive(nodeSub)
receivedNodepcdata = struct with fields:
    MessageType: 'sensor_msgs/PointCloud2'
         Header: [1×1 struct]
         Height: 1
          Width: 12474
         Fields: [4×1 struct]
    IsBigendian: 0
      PointStep: 32
        RowStep: 399168
           Data: [399168×1 uint8]
        IsDense: 0
rosPlot(receivedNodepcdata)

Use rosshutdown (ROS Toolbox) to shut down the ROS network in MATLAB. This shuts down the ROS master initialized by rosinit (ROS Toolbox) and deletes the global node.
rosshutdown
Shutting down global node /matlab_global_node_23143 with NodeURI http://vdi-bglwdp-222:52407/ and MasterURI http://localhost:11311.
Shutting down ROS master on http://172.19.135.186:11311.
Entry-Point Function
function helperPublishPointCloudMsg
 ld = coder.load("ptCloudData.mat");
 ptCloud = pointCloud(ld.location,Intensity=ld.intensity);
 groundPtsIdx = segmentGroundFromLidarData(ptCloud);
 groundPtCloud = select(ptCloud,groundPtsIdx);
 pcpub = rospublisher("/pc","sensor_msgs/PointCloud2","DataFormat","struct");
 pcdata = rosmessage(pcpub);
 pcdata = rosWriteXYZ(pcdata,groundPtCloud.Location);
 pcdata = rosWriteIntensity(pcdata,groundPtCloud.Intensity);
 send(pcpub,pcdata)
 pause(2)
end
See Also
rosinit (ROS Toolbox) | rospublisher (ROS Toolbox) | rossubscriber (ROS Toolbox) | segmentGroundFromLidarData