Import Custom Vehicle Meshes
This example shows you how to create and import a vehicle mesh that is compatible with RoadRunner Scenario. To create a compatible custom vehicle mesh, follow these workflow steps.
Step | Description | |
|---|---|---|
| Set Up Bone Hierarchy | In a 3D creation environment, set up the vehicle mesh bone hierarchy and specify part names. | |
| Assign Materials (Optional) | Optionally, assign materials to the vehicle parts. | |
| Export Mesh and Armature | Export the vehicle mesh and armature in the
. | |
| Import Mesh to RoadRunner Scenario | Import the vehicle mesh into the RoadRunner Scenario. | |
Note
To create the mesh, this example uses the 3D creation software Blender® Version 2.80.
Set Up Bone Hierarchy
Import a vehicle mesh into a 3D modeling tool, such as Blender.
To ensure that this mesh is compatible with RoadRunner Scenario, the minimal bone hierarchy in the mesh must include these vehicle parts using this naming convention.
Vehicle Part Name Vehicle
vehicle_nameVehicle body
bodyFront left wheel
wheel01Front right wheel
wheel02Back left wheel
wheel03Back right wheel
wheel04Set the name of the top-level vehicle object to the expected vehicle type, such as
Sedan. The top-level vehicle object must be the parent of the other vehicle objects.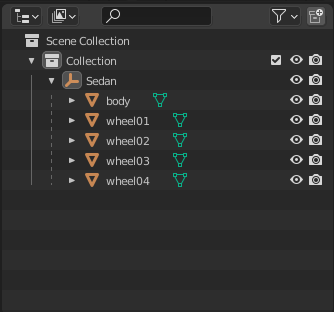
For two wheels on the same axle, such as
wheel01andwheel02, their transforms require that any difference in Y-axis offsets be less than 0.01 m. Otherwise, the wheels are categorized into different axles.
Assign Materials
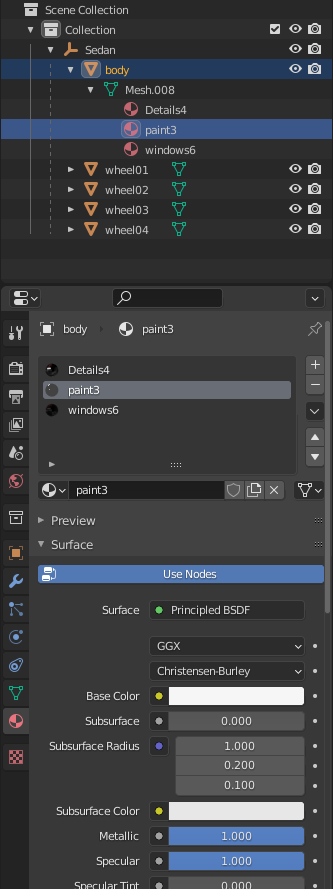
You can optionally assign a material slot to the vehicle body.
Applying a material containing the word paint to a mesh under the
body node enables you to modify the color of the mesh in the
RoadRunner Scenario
Attributes pane. Because RoadRunner Scenario multiplies the color, you can leave the material the default color of
white.

Create and assign material slots to the vehicle body. Confirm that the first material
slot corresponds to the body object. For example, this image shows
the hierarchy in Blender.
Export Mesh and Armature
Export the mesh and armature to the .fbx file format. For example,
in Blender:
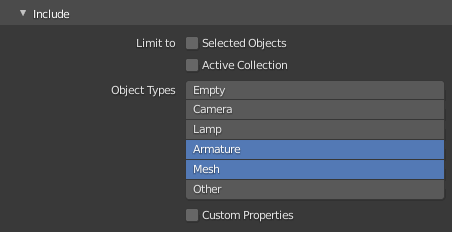
In the Include section, for Object Types, select Armature and Mesh.
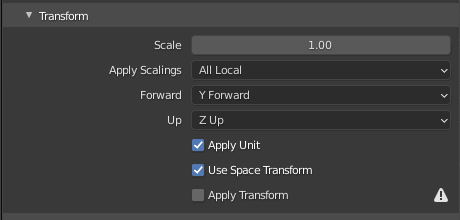
On the Transform section, set:
Scale to
1.00Apply Scalings to
All
                                        Local
Forward to
Y
                                        Forward
Up to
Z
                                    Up
Select Apply Unit and Use Space Transform.
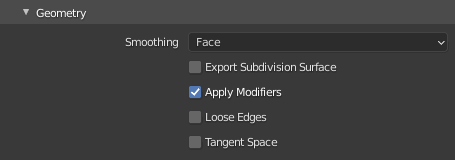
On the Geometry section:
Set Smoothing to
FaceSelect Apply Modifiers
On the Armature section, set:
Primary Bone Axis to
Y
                                        Axis
Secondary Bone Axis to
X
                                        Axis

Select Export FBX.
Import Mesh to RoadRunner Scenario
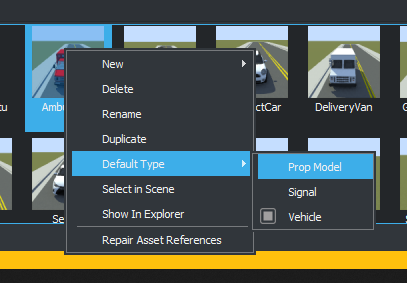
To import the new FBX model into RoadRunner Scenario, follow the instructions provided in Create, Import, and Modify Assets. After the new
vehicle has been imported, you must change the mesh to a
Vehicle type. In the asset browser, select the vehicle
asset and right-click, select Default Type > Vehicle.
Now you can use the new vehicle asset it in any RoadRunner Scenario simulations.
See Also
Create, Import, and Modify Assets | Import Scenarios from ASAM OpenSCENARIO XML Files