Cosimulation and FPGA-in-the-Loop in MATLAB-to-HDL Workflow
This example shows how to verify generated HDL code using HDL Cosimulation and FPGA-in-the-Loop as steps in the HDL code generation workflow for MATLAB® to HDL.
Requirements and Prerequisites
Products required for this example:
MATLAB
Fixed-Point Designer™
HDL Verifier™
FPGA design software (AMD® ISE® or Vivado® design suite or Intel® Quartus® II design software)
One of the supported FPGA development boards. For supported hardware, see Supported FPGA Devices for FPGA Verification.
For connection using Ethernet: Gigabit Ethernet Adapter installed on host computer, Gigabit Ethernet crossover cable
For connection using JTAG: USB Blaster I or II cable and driver for Intel FPGA boards. Digilent® JTAG cable and driver for AMD FPGA boards.
Prerequisites:
MATLAB and FPGA design software can either be locally installed on your computer or on a network accessible device. If you use software from the network you will need a second network adapter installed in your computer to provide a private network to the FPGA development board. Consult the hardware and networking guides for your computer to learn how to install the network adapter.
MATLAB Design
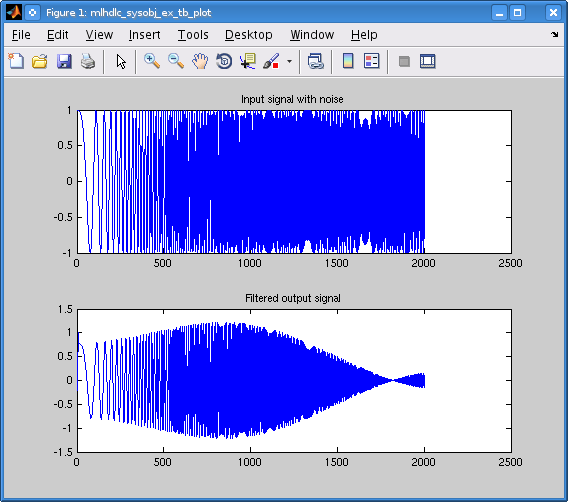
The MATLAB code used in this example implements a simple symmetric FIR filter and uses the dsp.Delay System object to model state. This example also shows a MATLAB testbench that exercises the filter.
Let us take a look at the MATLAB design.
type('mlhdlc_sysobj_ex.m');
%%%%%%%%%%%%%%%%%%%%%%%%%%%%%%%%%%%%%%%%%%%%%%%%%%%%%%%%%%%%%%%%%%%%%%%%%%
% MATLAB design: Symmetric FIR Filter
%
% Design pattern covered in this example:
%  Filter states modeled using DSP System object (dsp.Delay)
%  Filter coefficients passed in as parameters to the design
%%%%%%%%%%%%%%%%%%%%%%%%%%%%%%%%%%%%%%%%%%%%%%%%%%%%%%%%%%%%%%%%%%%%%%%%%%

%   Copyright 2011-2015 The MathWorks, Inc.

%#codegen
function [y_out, delayed_xout] = mlhdlc_sysobj_ex(x_in, h_in1, h_in2, h_in3, h_in4)
% Symmetric FIR Filter

persistent h1 h2 h3 h4 h5 h6 h7 h8;
if isempty(h1)
    h1 = dsp.Delay;
    h2 = dsp.Delay;
    h3 = dsp.Delay;
    h4 = dsp.Delay;
    h5 = dsp.Delay;
    h6 = dsp.Delay;
    h7 = dsp.Delay;
    h8 = dsp.Delay;
end

h1p = step(h1, x_in);
h2p = step(h2, h1p);
h3p = step(h3, h2p);
h4p = step(h4, h3p);
h5p = step(h5, h4p);
h6p = step(h6, h5p);
h7p = step(h7, h6p);
h8p = step(h8, h7p);

a1 = h1p + h8p;
a2 = h2p + h7p;
a3 = h3p + h6p;
a4 = h4p + h5p;

m1 = h_in1 * a1;
m2 = h_in2 * a2;
m3 = h_in3 * a3;
m4 = h_in4 * a4;

a5 = m1 + m2;
a6 = m3 + m4;

% filtered output
y_out = a5 + a6;
% delayout input signal
delayed_xout = h8p;

end
type('mlhdlc_sysobj_ex_tb.m');
%%%%%%%%%%%%%%%%%%%%%%%%%%%%%%%%%%%%%%%%%%%%%%%%%%%%%%%%%%%%%%%%%%%%%%%%%%
% MATLAB test bench for the FIR filter
%%%%%%%%%%%%%%%%%%%%%%%%%%%%%%%%%%%%%%%%%%%%%%%%%%%%%%%%%%%%%%%%%%%%%%%%%%

%   Copyright 2011-2015 The MathWorks, Inc.

clear mlhdlc_sysobj_ex;

x_in = cos(2.*pi.*(0:0.001:2).*(1+(0:0.001:2).*75)).';


h1 = -0.1339;
h2 = -0.0838;
h3 = 0.2026;
h4 = 0.4064;

len = length(x_in);
y_out_sysobj = zeros(1,len);
x_out_sysobj = zeros(1,len);
a = 10;

for ii=1:len
    data = x_in(ii);
    % call to the design 'sfir' that is targeted for hardware
    [y_out_sysobj(ii), x_out_sysobj(ii)] = mlhdlc_sysobj_ex(data, h1, h2, h3, h4);
end


figure('Name', [mfilename, '_plot']);
subplot(2,1,1);
plot(1:len,x_in); title('Input signal with noise');
subplot(2,1,2);
plot(1:len,y_out_sysobj); title('Filtered output signal');
Simulate the Design
Simulate the design with the testbench prior to code generation to make sure there are no runtime errors. Run this command in MATLAB.
mlhdlc_sysobj_ex_tb

Create a New HDL Coder™ Project
To create a new project, enter the following command:
coder -hdlcoder -new mlhdlv_cosimFIL_prj
Next, add the file 'mlhdlc_sysobj_ex.m' to the project as the MATLAB Function and 'mlhdlc_sysobj_ex_tb.m' as the MATLAB Testbench.
You can refer to the Get Started with MATLAB to HDL Workflow (HDL Coder) tutorial for a more complete tutorial on creating and populating MATLAB HDL Coder projects.
Define Input Data Types
For this floating point MATLAB System object all inputs are Double Scalar. Specify them as such using the drop-down menus provided for the MATLAB Function.

Run Fixed-Point Conversion and HDL Code Generation
Launch the Workflow Advisor. In the Workflow Advisor, right-click the 'HDL Code Generation' step. Choose the option 'Run to selected task' to run all the steps from the beginning through HDL code generation.
Examine the generated HDL code by clicking the links in the log panel of the Workflow Advisor.
Generate Cosimulation Testbench and Run HDL Cosimulation
Select the "Verify with Cosimulation" step.
Select the checkbox labelled "Generate cosimulation test bench". That action will enable other choices in the dialog, allowing you to elect to log outputs for comparison, choose your preferred HDL simulator and simulate the generated cosimulation testbench. Check both of the remaining checkboxes and select your preferred HDL simulator.
Select "GUI" as the HDL simulator run mode.

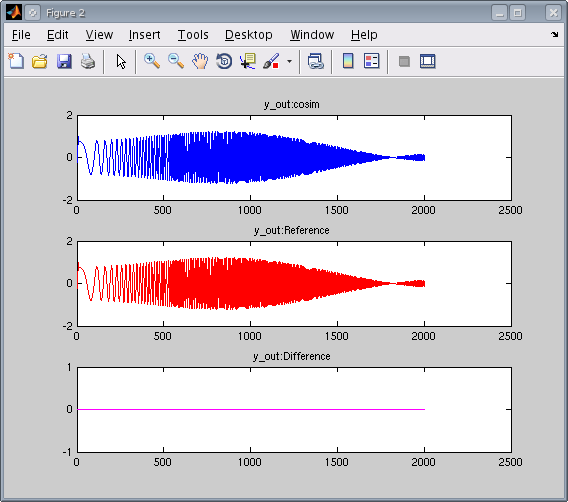
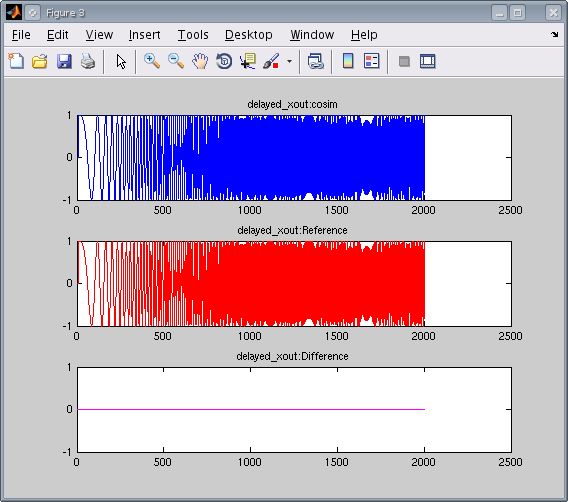
Click "Run" and observe the plots comparing the outputs of the cosimulation to the outputs of the fixed point System object. Also note the signal transitions in the HDL simulator waveform viewer.


Set Up Your FPGA Development Board
Refer to Step 1. Set Up FPGA Development Board for information on setting up your FPGA board and computer to communicate for FPGA-in-the-Loop simulation.
Generate FPGA-in-the-Loop (FIL) Testbench and Run FIL Simulation
Select the "Verify with FPGA-in-the-Loop" step in the left side panel of the Workflow Advisor.
Select all 3 checkboxes (for FPGA-in-the-Loop testbench generation, output logging, simulation of the generated FIL testbench.
Select the FPGA development board of your choice.

Click "Run" and observe the plots comparing the outputs of the FPGA to the outputs of the fixed point System object.
Clean up the Generated Files
Run the following commands to clean up the temporary project folder.
clear mex;
cd (hdlverif_demo_dir);
rmdir(mlhdlv_temp_dir, 's');