Configure OPC UA Client in Simulink
Configure an OPC Unified Architecture (UA) client to read or write data in Simulink® using the OPC UA Read or OPC UA Write blocks.
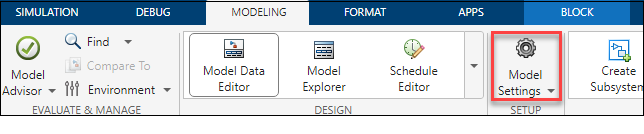
In the Simulink toolstrip, click Model Settings in the Modeling tab to open the Configuration Parameters dialog box. In the dialog box, click the OPC Configuration pane to configure the required OPC UA clients.
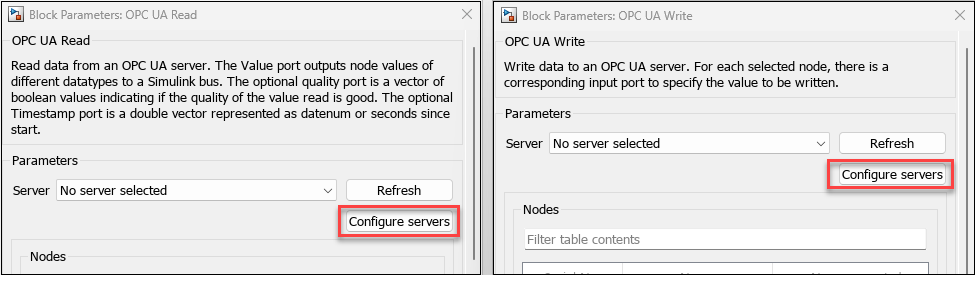
Alternately, click Configure servers in the OPC UA Read or OPC UA Write blocks to open the OPC Configuration pane.
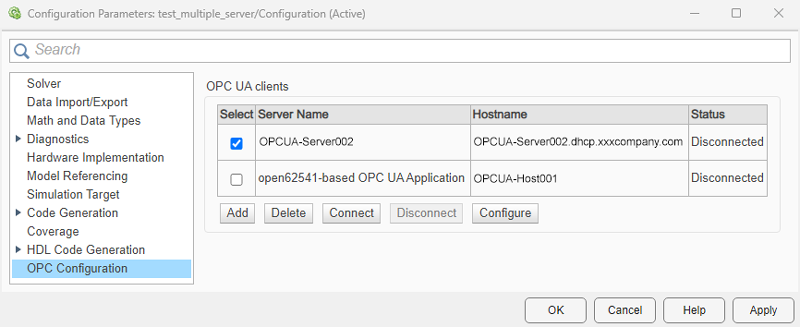
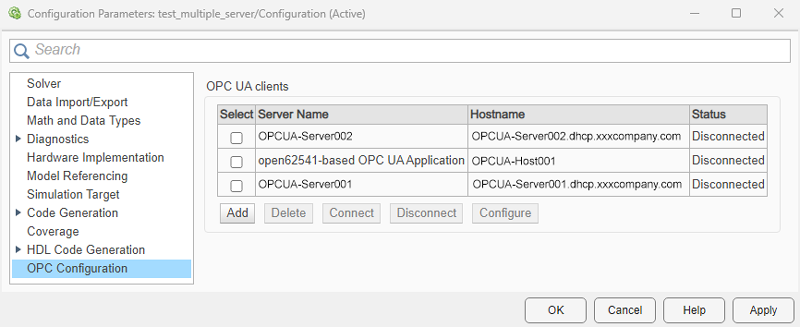
The OPC Configuration pane lists all the OPC UA clients that you configure in the current model. You can use the buttons in this window to add, delete, connect, disconnect, and configure the clients.
Add: Create a new OPC UA client for an OPC UA server. Simulink configures the client by default with the highest available security policy on the server.
Delete: Delete the selected client.
Connect: Enable server connection for the selected client.
Disconnect: Disconnect the selected client.
Configure: Edit the security policy of the selected client.
OPC UA Client Configuration
Complete these steps to configure an OPC UA client for a Simulink model.
Note
To enable the OPC Configuration pane in the Configuration Parameters dialog box of the model, you must include an OPC UA Read or OPC UA Write block in the model.
Step 1: Create OPC UA Client
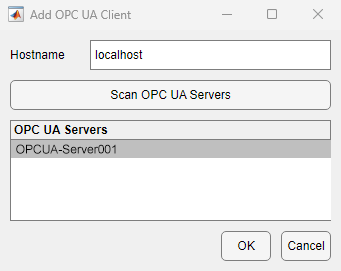
To create a new OPC UA client, click Add. The Add OPC UA Client dialog box lists
localhostas the default Hostname. You can add any valid OPC UA discovery URL in this field.
Note
Before scanning the
localhostfor installed OPC UA servers, you must set up a Local Discovery Service (LDS) on the host computer, as described in Install a Local Discovery Service for OPC UA Server Discovery.To view the available servers, click Scan OPC UA Servers. Select a server.
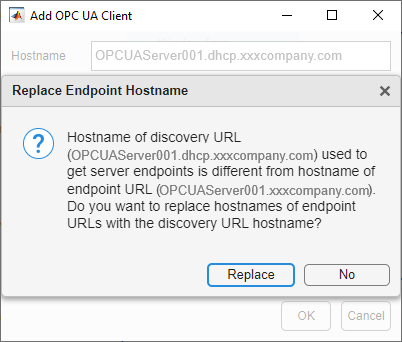
When the hostname of the server's discovery URL is different from the hostname of the endpoint URL, Simulink provides an option to replace the endpoint URL with the discovery URL hostname.
Simulink creates a new OPC UA client for the OPC UA server with the highest available security policy and adds the client to the OPC UA clients table.
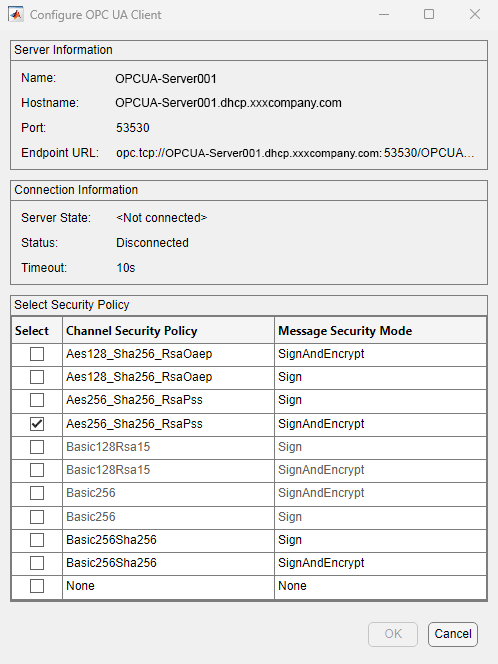
Step 2 (Optional): Configure Security Policy of OPC UA Client
By default, Simulink configures every client with the highest available security policy. To edit the security policy, disconnect the client and click Configure. From the list, select a channel security policy and its corresponding message security mode. For more information on security policies, see OPC UA Authentication and Message Encryption.
Note
Security Considerations: When you communicate with an OPC UA server, use the highest available channel security policy and message security mode.
If you select the None option in the
MessageSecurityMode and
ChannelSecurityPolicy settings, the messages are
sent as clear text because they are not signed and encrypted. Use this
setting only in a trusted environment.
For an OPC UA server that does not support a security policy, request the
server administrator to enable a channel security policy and message
security mode for the server other than None. These
settings enable encryption and authentication for your data and
operations.
Step 3: Connect OPC UA Client
Select a client from the OPC UA clients table and click Connect. The Connect OPC UA Client dialog box displays the three types of user identity tokens supported by the OPC UA servers. For more information, see User Authentication.
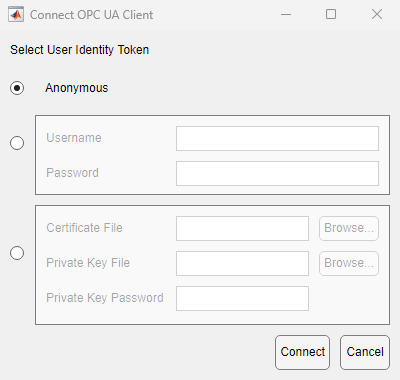
Select the appropriate user identity token and fill in the details. Click Connect.
Anonymous token requires no input from user.
Username token requires a valid Username and Password.
Certificate token requires a Certificate File (*.DER file), a Private Key File (*.PEM file) and a Private Key Password.
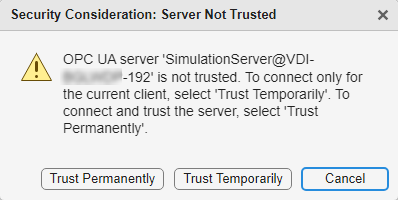
If the client attempts to connect with a server whose certificate is not included in the MATLAB® OPC UA client's trusted certificate store, select one of these options from the security considerations dialog box:
Trust Permanently: This option adds the server certificate to the MATLAB OPC UA client's trusted certificate store and allows you to connect any MATLAB OPC UA client created on the local system to the server.
Trust Temporarily: This option allows you to connect only the current OPC UA client to the server.
Cancel: This option allows you to cancel the connection request for the specified server.
Once you successfully connect to the client, its status in the OPC UA clients table updates to
Connected.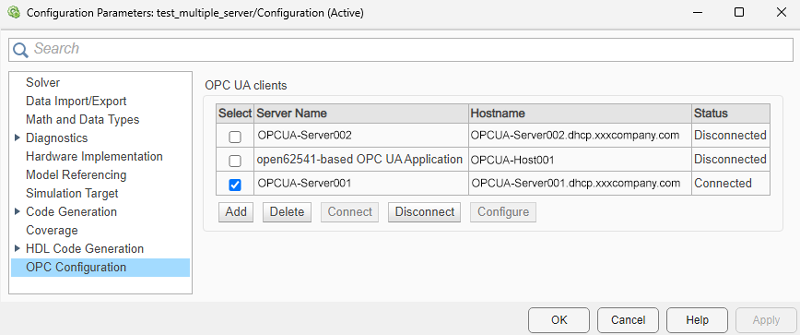
Step 4: Update Client Information in Model
Click OK in the Configuration Parameters window to update the model with information about the new OPC UA client. The changes you make to the OPC UA clients table using the Connect, Disconnect, and Configure are instantaneous.
Step 5: Configure OPC UA Block with Server Connection
The OPC UA blocks in the model list all the server connections that you have added in the OPC UA clients table.

Select the Server to associate the block with the corresponding OPC UA client.